Follow these steps to create new expiration reminder.
- From the Dashboard or from Explorer page, click +New button.
- Association: Select folder to associate your expiration reminder. Your new expiration reminder will be saved in this folder. You can always create new folders.

- Document Data: Select a document type from the list. You can add more document types.
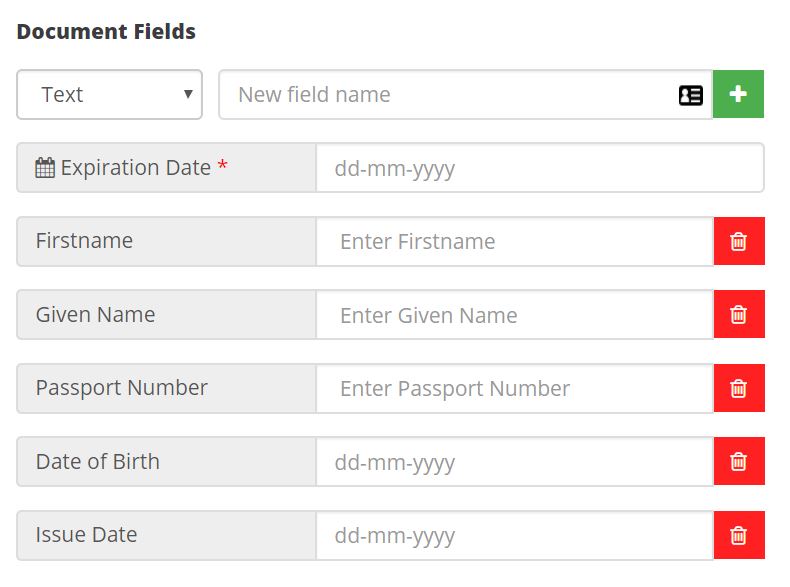
- Every document type can have pre-defined FIELDS. You can add/remove fields as per your requirements.
To add a new field:
- Select FIELD TYPE (Text/Number/Date) from the drop down list.
- Enter new field’s name and click green plus button.
- You can add up to 32 fields per document.
- To delete a field, click the red Delete button.
- Check Auto Renew if you want this document to renew automatically when expired.

- Enter notes/comments related to your document. This is optional.
- Notifications: Plan your notification frequency. You can set notifications before, on or after the expiration date.
Click +Add a notification to add more notifications.
Click Delete button to delete a notification.
You can add up to 12 notifications per document.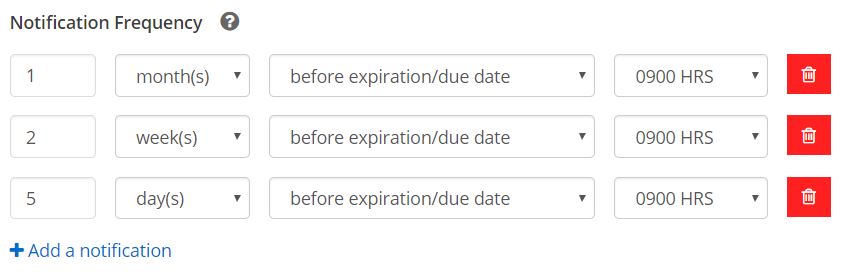
- Select Yes/No to send notifications to account admin.

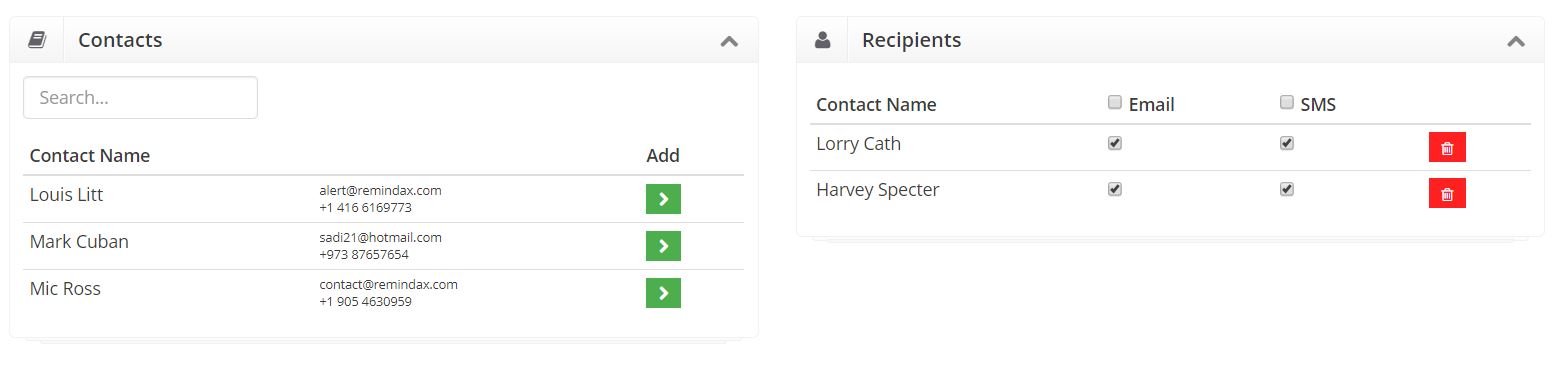
- Contacts: You can schedule email or SMS notifications for each of your contacts. You can always add new contacts to your contact list.
- To select recipients:
- Click the green button to add that contact to recipient’s list.
- Next, select email/SMS check box for this contact.
- To remove a contact from the list, click DELETE.
- You can add up to 12 contacts per document.
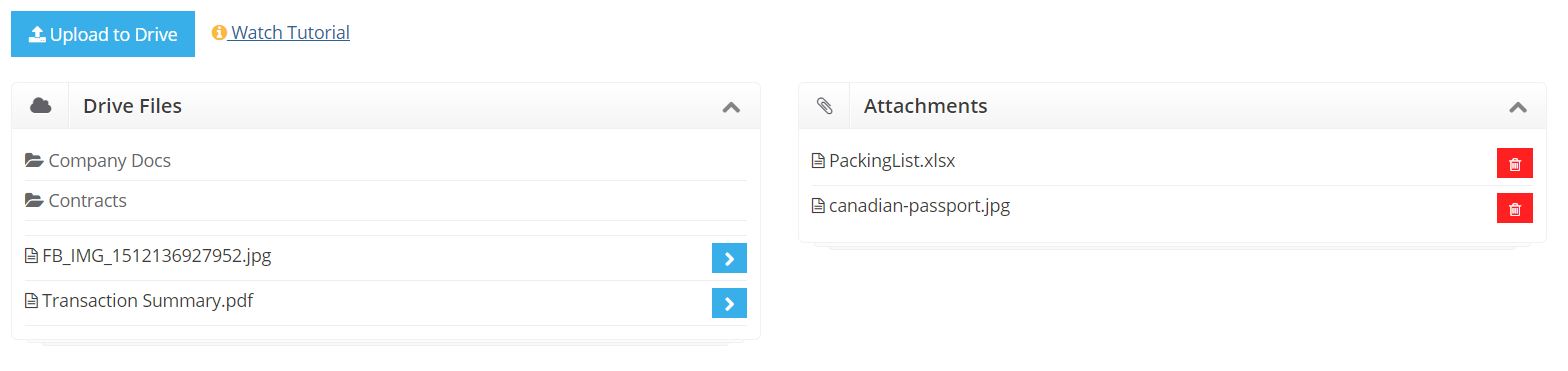
- Attachments: You can attach files with your expiration reminder. This file will be included in the reminder email.
- Once you have completed the required document fields, click Save Document.